I Wore Ray-Ban Meta Glasses for 24 Hours Straight – Can They Really Replace Your Phone?

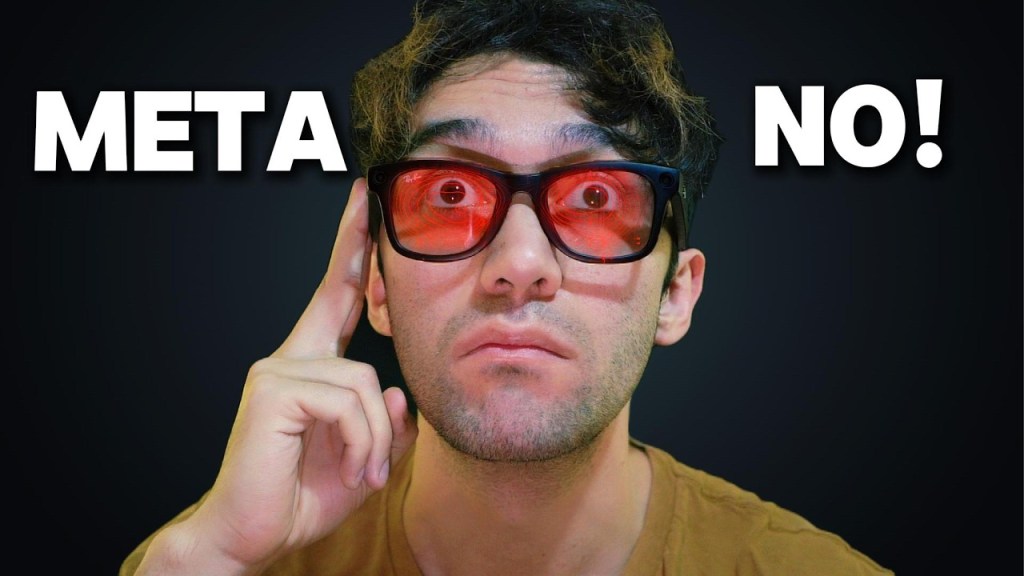
Can AI glasses replace your smartphone? For 24 hours, I put the Ray-Ban Meta Smart Glasses to the test as my only device. No phone. No screen. Just these futuristic glasses equipped with AI, speakers, cameras, and microphones.

These are among the most popular AI glasses you can buy right now. But can they really replace your smartphone or are they just a cool gimmick? Here’s what I learned after wearing them non-stop for a full day.

👉 Check out the Ray-Ban Meta Glasses and styles here


First Impressions – What Can These Glasses Actually Do?

At first glance, these glasses have impressive features:

  • Five microphones for clear audio
  • Bone-conduction speakers to keep you aware of your surroundings
  • A built-in AI assistant (powered by ChatGPT)
  • Ability to call, text, take photos, record videos, live stream, and more
  • No screen—but is that really a downside?

To find out, I hit the streets and asked people:

Do you think AI glasses will ever replace smartphones?

Surprisingly, most people thought “yes”, and were excited about where AI is heading—even if they weren’t fully familiar with the tech yet.


Living Without a Phone for a Day

For the next 24 hours, these glasses were my lifeline. Here’s how they stacked up:

✅ Texts, Calls, and Podcasts

  • I texted friends using just my voice
  • Made calls easily
  • Put on my favorite podcast while walking through the city
    All hands-free, all seamless.

✅ The AI Cheat Code

One of the coolest features?
I used the glasses to summarize pages from a book—all without pulling out my phone or laptop.

✅ My Favorite Feature: Describing the World Around Me

  • I asked Meta to describe what it saw and even write a poem about a yellow taxi passing by.
  • Later, it helped me write song lyrics on the fly!
    I finished the song way faster than I would have on my own.

How It Changed My Day

Without social media or constant notifications, I was way more present in the world around me.
It felt refreshing—almost like a digital detox but without losing core functionality like calling, texting, and listening to music.

⏰ Timer as an Alarm

Fun fact: while Meta can’t set an alarm yet, you can use a timer workaround to wake up on time.


An Unexpected Twist

Later that evening, an emergency took me to the hospital with a family member.
Even during stressful moments, not having a phone glued to my hand was grounding.
I was fully present, spending quality time without distractions.


The Verdict – Can These Glasses Replace a Phone?

🟢 Yes… but also no.

For now, these glasses can replace 80-90% of what you use your phone for:

  • Calls & texts
  • Music & podcasts
  • AI assistance & translations
  • Instant photo/video capture

But they aren’t quite a full replacement—yet. They’re more of an enhancement for someone who wants fewer distractions and more hands-free control.


Who Are They Really For?

If you:

  • Already wear glasses
  • Want to minimize screen time
  • Love experimenting with cutting-edge tech
  • Need a personal AI assistant everywhere you go
    These could be perfect.

While future AR glasses with displays will likely be more mainstream, Ray-Ban Metas are for minimalists and tech lovers who want to experience a new way to interact with the world.


Final Thoughts

Incredible for mental health
Feels futuristic, but very practical
Way more immersive and freeing than expected

👉 Check out these AI glasses and explore the styles here

The above links are affiliate links and help support me at no extra cost to you.


World’s BIGGEST Phone Lens! 15,000MM Zoom – Insane or Useless?

Smartphone cameras are getting better every year, but no phone comes close to the insane zoom range of this 15,000MM lens. For reference, the world’s biggest camera lens I previously tested only reached 4,000MM—and this smartphone lens nearly quadruples that.

But is it actually usable, or is it just a gimmick? I took it out to a wildlife refuge and put it through real-world tests. Here’s what happened.


🔥 Wildlife Photography at 1,500MM Zoom

Before we max out the zoom, let’s start at 1,500MM—just 10% of what this lens can do.

Sharp images—better than I expected for a budget super-zoom
Great for bird photography—getting close-up shots without disturbing them
Easy manual focus—but definitely shaky if you don’t stabilize it

📸 Test Results: The birds looked incredible. I was able to see details I couldn’t even spot with my 20/20 vision. But the real test? Tracking fast-moving subjects.


🏃 Following Fast-Moving Subjects at 3,000MM & 6,000MM

At 3,000MM, tracking moving subjects became harder. At 6,000MM, it was almost impossible without a tripod.

Incredible reach—I could see ducks on the far end of a lake, houses on a distant hill, and even cars miles away.
Stability is an issue—even minor movements cause huge shakes in the frame.
Still sharp at 6,000MM—as long as I let go of the phone and let it settle.

I was shocked at how good the image quality was, but what happens when we push it even further?


🌕 Moon Shots & The 12,000MM Test

The moon was initially hard to find, but once I did, it came in incredible detail!

But at 12,000MM, something unexpected happened:

⚠️ Chromatic aberration increased – noticeable purple fringing around edges
⚠️ Focus became extremely sensitive – tiny adjustments threw off clarity
Still insane detail for a budget phone lens

This is way beyond what the lens was designed for. It’s technically only supposed to reach 1,500MM, so at 12,000MM and beyond, it’s stretching the limits.

That said… I had one more test to push it to the absolute extreme.


💥 15,000MM Mega Zoom – Does It Even Work?

At full 15,000MM zoom, things got crazy.

👀 What I Could See:
The road horizon disappearing around a corner miles away
Distant objects I couldn’t even see with my naked eye
Birds that looked microscopic at normal zoom became HUGE

But here’s the truth:

⚠️ The quality suffers at max zoom – digital zoom + optical = blurry images
⚠️ Shaky beyond belief – without a tripod, this level of zoom isn’t practical
⚠️ Not meant for this – remember, this is a 1,500MM lens, not 15,000MM

Despite all that, the fact that this is even possible with a budget smartphone lens is mind-blowing.


🏆 Who Is This Lens For?

This lens is actually useful for:

✔️ Wildlife & Bird Photography – Get clear close-ups from far away
✔️ Long-Distance Nature Shots – See horizon details your eyes can’t
✔️ Budget-friendly super zoom – Better than some $200+ DSLR lenses

But if you need extreme clarity at 15,000MM, this isn’t for you.


⚡ Final Thoughts – Should You Buy It?

I expected this lens to be trash, but instead, it blew me away.

💰 Way cheaper than pro camera lenses
📸 Better than expected quality at 1,500MM
⚠️ Shaky at extreme zoom levels

🔗 Get it here: The 15,000MM Lens (affiliate link)

Honestly? If you love wildlife photography or just want the craziest zoom on your phone, this is worth it.

Windows RUINED My Life – Here’s Why I’m Never Buying a Windows Laptop Again

For years, I stuck with Windows laptops—from cheap plastic models to a $3,000 Dell flagship laptop that was supposed to be top of the line. Every single one of them failed me. Corrupt files, dead batteries, memory failures at the worst possible times—you name it.

I dealt with random shutdowns, forced updates, bad trackpads, bloated software, and slow performance. I kept thinking, “Maybe I just need a better Windows laptop.” But then I bought a MacBook… and everything changed.

Here’s why I’m never going back—and why you might not want to either.


💀 My Windows Nightmare

🖥️ Every Windows Laptop I Had… Died

Growing up, my family only bought Windows laptops. And every single one of them lasted 4–5 years MAX before completely falling apart.

🔹 My first laptop? Died from viruses and was so corrupted that I lost all my parkour videos forever.
🔹 My second laptop? Extremely slow, felt like a cheap plastic toy, and couldn’t handle anything beyond web browsing.
🔹 My third laptop? This was supposed to be the fix. I bought the most expensive Dell laptop they had in 2015.

Specs:
4K touchscreen (rare at the time)
Top-tier processor
Max RAM & Storage
💰 $3,000+ price tag

🎯 On paper, this should have been a powerhouse.
💀 In reality, it was a disaster.


🛑 Why My $3,000 Dell Laptop STILL Sucked

Even though I spent more money, the problems didn’t go away.

⚠️ Hardware Failures

USB Ports Stopped Working – I had to plug in and unplug my devices constantly just to get them to connect.

The Battery Died Completely – It could only run while plugged in. Not great for a laptop.

RAM Completely Failed While I Was Working – I was doing paid video editing at a camp, and the laptop just stopped working.

I replaced the RAM, battery, and hard drive—and guess what? The new battery didn’t work either.


🍏 My First MacBook – And Why I’ll Never Look Back

At this point, I was done with Windows laptops. But I needed a MacBook for iOS development since Apple doesn’t let you develop iPhone apps on Windows.

So, I got a used 2015 MacBook Pro 15” for less than $500—the same year my $3,000 Dell was released.

🎯 Guess what? This thing DESTROYED my Windows laptop in every way:

Never crashed, never needed repairs
Handled video editing and coding like a champ
Battery life lasted way longer
No bloatware, no Windows nonsense

It was faster, more stable, and more reliable than a laptop that cost SIX TIMES as much.


🛠️ Windows vs. MacBook: The Real Differences

At first, I didn’t realize how bad Windows laptops were. But after switching, the differences became obvious:

🛑 Windows Is Full of Distractions & Bloatware

🔹 Pre-installed junk apps clutter the system
🔹 Random updates slow everything down at the worst times
🔹 Too many customization options = Decision anxiety

MacBook = Clean, simple, and optimized for productivity.

🎯 MacBooks Make You More Productive

When I switched, I got way more work done:

Xcode for iOS apps is WAY better than Android Studio
MacOS multitasking is smooth—easy screen switching
No more tech headaches—just open it and get to work

I used to think all trackpads sucked. Nope. Windows trackpads sucked.

🎯 MacBook Trackpad = Actual Magic

Windows trackpads – Unreliable, laggy, imprecise
MacBook trackpadBetter than most mice, amazing gestures

Now I prefer the trackpad over a mouse for a lot of tasks.


🚀 Should You Get a MacBook?

If you game a lot, customize everything, or need ultra-specific software for Windows, stick to a desktop PC.

But if you want:
A laptop that just works
No bloatware or unnecessary updates
A machine that lasts YEARS without breaking
Better performance even with “lower” specs

Then a MacBook is the way to go.


💰 What I’d Get Instead of a Windows Laptop

If you’re ready to ditch Windows laptops too, I’d recommend this:

➡️ Best Budget MacBook: Check Price (Perfect for students and everyday use!)

💡 Final Thought: I’m not saying Windows itself sucks—but Windows laptops do.

📢 What do you think? Have you ever had a Windows laptop nightmare? Let me know in the comments!

Cameras Make You POOR – Here’s Why (And How to Avoid it)

Photography and videography are amazing hobbies, but they come with a price—literally. Camera gear can easily cost thousands, if not tens of thousands of dollars. But why is that? And more importantly, is there a way to get into cameras without going broke?

In this article, we’ll break down:
Why cameras are so expensive
The smartest ways to save money on camera gear
How to get professional gear without draining your wallet

Let’s dive in.


📸 Why Is Camera Gear So Expensive?

1️⃣ The Audience Is Small and Specialized

Unlike smartphones, which billions of people buy, high-end cameras cater to a tiny market. The fewer buyers there are, the more companies have to charge to make a profit.

Think of it this way:
🔹 iPhones – Almost everyone needs a phone → Lower prices due to mass production
🔹 Cheap cameras – People who want better quality than their phone → Mid-range pricing
🔹 Pro cameras – Semi-pros and serious hobbyists → Higher pricing, but still accessible
🔹 Hollywood-level cameras – Only a handful of people need these → $40K+ price tags

📊 Fewer buyers = Higher prices per unit.


2️⃣ Camera Gear Lasts Too Long (Which Sounds Like a Good Thing, But Isn’t)

Unlike phones, which need upgrades every 2-3 years, a high-quality camera or lens can last a decade or more. This means camera brands can’t rely on frequent upgrades to drive profits, so they charge more upfront.

Think about it:
✅ A Sony A7 III (2018) is still an amazing camera today
✅ A Canon 5D Mark III (2012) is still used by professionals
Lenses last FOREVER – A great 50mm lens from 1990 is still just as good today

💡 Since people don’t upgrade cameras as often as they do phones, companies charge more per sale to make up for lower demand.


3️⃣ New Models Are Released SLOWLY

Unlike the iPhone, which gets a new model every year, cameras and lenses don’t update nearly as fast.

🔹 iPhones → New every 12 months 📅
🔹 Sony Cameras → Every 3-4 years
🔹 Lenses → Sometimes they last 10+ years without a major update 🏆

💰 Fewer releases = Higher prices because brands need to make the most money out of each model.

And guess what? Lenses hold their value even better than cameras. You can buy a lens today, use it for 5 years, and resell it for nearly the same price.


💸 How to Get Into Cameras Without Going Broke

Now that we know why camera gear is expensive, let’s talk about how to get pro-level gear for a fraction of the price.


1️⃣ Buy Used, Not New

Cameras lose value fast. You can save 30-50% by buying last year’s model used instead of new.

Best places to buy used:
eBay – Good deals, but check seller ratings
Adorama / B&H Used – Reputable camera shops
Facebook Marketplace – Local deals can save you a ton
Local camera stores – Many have trade-in programs

📌 Example Savings:
💰 Sony A7 IV New – $2,500
💰 Sony A7 IV Used – $1,800 (Save $700!)

Used cameras work just as well and often come with barely any wear.


2️⃣ Rent Before You Buy

If you only need a high-end lens or camera for a weekend project, rent it instead.

🎥 Places to rent gear cheaply:
LensRentals.com – Huge selection
Local camera shops – Often cheaper than online
Borrow from friends – Best price = FREE

💡 Why spend $3,000 on a lens when you can rent it for $30?


3️⃣ Upgrade Lenses Slowly & Trade Up

Lenses hold their value, which means you can trade up slowly over time.

Here’s a smart way to upgrade:
📷 Start with a $200 used lens
📷 Sell it for $150
📷 Buy a $500 lens with the $150 from the first sale
📷 Sell that later for $400 and buy a $1,000 lens

Over time, you’ll end up with a pro lens without ever dropping $3,000 in one go.


4️⃣ Skip the Camera, Use Your Phone

Smartphone cameras are insanely good now.

🔹 If you’re just starting, an iPhone 15/16 or Samsung S24 Ultra has better image quality than most $500 cameras.
🔹 You can use apps like Filmic Pro to get DSLR-like manual controls.
🔹 The biggest difference is lenses, but for casual use, your phone might be enough.

💡 Before dropping thousands on a camera, ask yourself: Do I REALLY need it?


5️⃣ Don’t Buy Everything at Once

New photographers often think they need:
❌ A $3,000 camera
❌ Five different lenses
❌ A drone
❌ Studio lighting

🚨 Big mistake.

👊 Start small:
✔ Get a used DSLR or mirrorless camera
✔ Pick ONE good lens (like a 50mm f/1.8 for portraits or a 16-35mm for wide shots)
✔ Learn how to use it inside and out
✔ Upgrade only when you actually NEED to

💰 Most beginners waste thousands on gear they don’t even use. Don’t be that person.


💡 Final Thoughts

Cameras are expensive, but they don’t have to make you broke.

Buy used instead of new
Rent lenses for short-term needs
Upgrade slowly by reselling old gear
Use your phone if you don’t really need a camera
Start with one lens and build from there

💡 It’s not about having the best gear—it’s about knowing how to use what you have.


📢 What do you think? Have you ever regretted spending too much on camera gear? Let me know in the comments!

Which MacBook Is Right for You in 2025?

Choosing a MacBook can feel overwhelming, especially with all the different models available in 2025. Whether you’re a student, a professional, or someone who just wants the absolute best, there’s a MacBook that fits your needs. Here are the top three MacBooks for every type of user, plus an honorable mention that might surprise you.

👉 Check out the best MacBooks for 2025:
Best Budget MacBook
Best Powerhouse MacBook for Professionals
Best of the Best MacBook
Honorable Mention – A Hidden Gem


1️⃣ Best Budget MacBook – Perfect for Students & Everyday Use

📌 2020 MacBook Air (M1, 13-inch, 8GB RAM)
💰 Price: Starts as low as $400 renewed, or even $300 used

If you’re a student, a casual user, or someone who just wants a solid laptop without spending a fortune, this is the best choice.

Why It’s Worth It

Incredible value for the price – A true steal at under $500
Handles everyday tasks flawlessly – Web browsing, Netflix, email, and even light video editing
Insane battery life15+ hours on a single charge
M1 chip is still crazy fast – Even for some creative work

Who Should Buy This?

✔ College students who need a lightweight, reliable laptop
✔ Writers, freelancers, and remote workers who don’t need extreme power
✔ Budget-conscious buyers looking for the best deal on a MacBook

🎯 Final Verdict: If you want a laptop that just works without breaking the bank, get this one.

🔗 Check the latest price: Amazon Link


2️⃣ Best MacBook for Professionals & Power Users

📌 2021 MacBook Pro 16-inch (M1 Pro, 16GB RAM)
💰 Price: Around $1,100 renewed

If you’re a video editor, programmer, designer, or someone who needs a powerful machine, this is the best MacBook for serious work.

Why It’s Worth It

🔥 16GB RAM & M1 Pro Chip – Handles 4K video editing, music production, and coding with zero lag
🔥 Big, beautiful 16-inch screen – Perfect for multitasking
🔥 Studio-quality speakers – Better sound than most external speakers
🔥 Whisper-quiet fans – You’ll barely hear them, even under heavy loads

Who Should Buy This?

Creatives – Video editors, music producers, and photographers
Programmers & developers – Handles multiple Xcode, VS Code, or Docker instances easily
Professionals who want power without spending $4,000

🎯 Final Verdict: This is hands-down the best MacBook for high-performance work without overpaying.

🔗 Check the latest price: Amazon Link


3️⃣ Best of the Best – The Ultimate MacBook for 2025

📌 2025 MacBook Pro (M4 Max, 48GB RAM)
💰 Price: Around $4,000+

If you want the absolute best, money is no object, and you demand cutting-edge performance, this is the most powerful MacBook ever made.

Why It’s Worth It

🚀 Apple Intelligence (AI Integration) – The first MacBook with built-in Apple AI enhancements
🚀 Up to 48GB RAM – More memory than most gaming PCs
🚀 M4 Max Chip – Insane performance for 3D modeling, AI training, or professional film editing
🚀 Perfect for high-end creative work

Who Should Buy This?

Extreme professionals – Filmmakers, 3D artists, and machine learning engineers
Those who want the absolute best, no compromises
People who use multiple monitors and need max power

🎯 Final Verdict: If you have the budget and want the fastest MacBook ever made, this is the one.

🔗 Check the latest price: Amazon Link


🎖 Honorable Mention – A Hidden Gem You Might Not Expect

📌 MacBook M3 Pro (14-inch, 2023-2024)
💰 Price: Often found cheaper than the latest models

This one is for those who want a balance of power and price. It’s faster than the M1 Pro, cheaper than the M4 Max, and still future-proof for years.

Why It’s Worth Considering

Faster than M1 Pro, but cheaper than M4 Max
14-inch size is the sweet spot for portability and power
Perfect for creatives and professionals who want top-tier performance without overspending

🎯 Final Verdict: If you need something newer than M1 Pro but don’t want to spend $4,000, this is your best bet.

🔗 Check the latest price: Amazon Link


💡 Final Thoughts – Which One Should You Buy?

🔹 If you want the best budget deal → Get the 2020 MacBook Air (M1)
🔹 If you need serious power without breaking the bank → Get the 2021 MacBook Pro (M1 Pro, 16-inch)
🔹 If you want the best money can buy → Get the 2025 MacBook Pro (M4 Max)
🔹 If you want a balance of power & price → Check out the MacBook M3 Pro (14-inch)

👉 Still not sure? Drop a comment below! I’ll help you figure out which MacBook is best for your needs.

🔗 Check out all the MacBooks mentioned in this guide:
Best Budget MacBook: Amazon Link
Best Powerhouse MacBook for Professionals: Amazon Link
Best of the Best MacBook: Amazon Link
Honorable Mention – A Hidden Gem: Amazon Link

(These are affiliate links, meaning if you purchase through them, it helps support this content at no extra cost to you!)

Which MacBook are you getting in 2025? Let me know in the comments!

Ray Ban Meta Long-Term Review (2025) – Are They Still Worth It?

I’ve owned the Ray-Ban Meta Smart Glasses for over six months, and it’s time for an honest long-term review. Do I still think they’re worth it? Have they held up over time? What features stand out, and what issues have I run into? If you’re considering getting a pair, here’s everything you need to know.

👉 Check out the Ray-Ban Meta Smart Glasses here: Ray Ban Meta Glasses in multiple colors – Amazon (Affiliate link, supporting the content at no extra cost to you!)


🔥 What I Love About the Ray-Ban Meta Smart Glasses

These glasses have some incredible features that set them apart from anything else on the market. Here are the biggest standouts:

1. Five Microphones for Outstanding Call Quality

  • The built-in microphones in the bridge of the glasses provide crystal-clear audio.
  • Call quality is actually better than AirPods, according to people I’ve spoken with on video and audio calls.
  • Whether you’re in a busy street or a quiet room, voices come through incredibly clear.

2. Bone Conduction Audio – Listen to Music Without Earbuds

  • The bone conduction speakers allow you to listen to music while staying fully aware of your surroundings.
  • It’s a great alternative to AirPods, especially when walking in the city or working out.
  • You can hear everything around you, while still enjoying music, podcasts, or calls.

3. Built-in 1080p Camera for POV Recording

  • You can shoot 1080p vertical videos with just a tap on the side of the frame.
  • Initially, the glasses had a 60-second recording limit, but that has now been increased to 3 minutes.
  • This is perfect for capturing spontaneous moments without pulling out your phone.

4. Real-Time AI Assistant and Object Recognition

  • This feature blew my mind—the AI assistant can identify objects, translate text, and describe scenes.
  • Example: I asked, “Hey Meta, what’s this plant?” and it correctly identified a rosemary bush.
  • It can also translate foreign languages on signs, menus, and even conversations.

5. No Need to Pull Out Your Phone

  • Instead of taking 10+ steps to open an app on your phone, you can just ask Meta AI.
  • Whether you need directions, weather updates, or random trivia, it works like an upgraded Siri without needing a screen.

👎 What I Don’t Love About the Ray-Ban Meta Smart Glasses

As great as these glasses are, there are some downsides worth mentioning.

1. The 3-Minute Recording Limit

  • While it’s better than 60 seconds, I still wish there was no limit.
  • I get why it exists (overheating issues), but a future update or hardware upgrade would be great.

2. I Don’t Normally Wear Glasses

  • I got laser eye surgery years ago so I wouldn’t have to wear glasses.
  • That said, I still wear these regularly because the design is actually stylish.

3. The App Initially Had Transfer Issues (Now Fixed!)

  • When these first launched, you had to keep the app open to transfer videos.
  • That was annoying, but thankfully Meta fixed it—now you can close the app and still transfer media.

4. No Horizontal Video Mode

  • I love flexibility in filming—my phone and camera can easily switch between vertical and horizontal.
  • But these only record in vertical mode.
  • I wish they had an option to flip the orientation for landscape recording.

🎯 Who Are These Glasses Best For?

These aren’t for everyone, but they’re absolutely worth it for certain people.

If You Already Wear Glasses

  • Prescription lenses can be added, making these a powerful upgrade to normal glasses.
  • Price-wise, they cost about the same as regular glasses but with way more functionality.

If You Use AirPods Daily

  • These are only $100 more than AirPods Pro but offer better call quality and music playback.
  • No earbuds = better awareness of your surroundings.

If You’re a Creator or Love Capturing Moments

  • POV recording makes it easier to document experiences hands-free.
  • You don’t need to pull out your phone—just press a button and start recording.
  • Perfect for travel vlogs, action sports, and everyday memories.

If You Love Smart Tech and AI Assistants

  • The AI recognition and voice control features make these feel like the future of smart glasses.
  • Being able to identify objects, plants, and people just by looking at them is something straight out of sci-fi.

💪 Durability & Long-Term Wear

  • I’ve dropped these multiple times, and they still work perfectly.
  • They charge in the case, and battery life is excellent.
  • The design is sleek and stylish, with different models and colors available.

🚀 Final Verdict – Are They Still Worth It in 2025?

💯 YES, especially if you wear glasses or use AirPods often.
Even though I don’t normally wear glasses, I still use them every week.

What I’d Like to See in Future Versions:

Longer recording limits (or no limit at all)
Horizontal video mode for YouTube-style filming
Even more AI capabilities

If any of those features get added, these could become a must-have daily wearable for everyone.

👉 Check out the Ray-Ban Meta Smart Glasses here: Ray Ban Meta Glasses – Amazon (Affiliate link – helps support this content at no extra cost to you!)


Do you think smart glasses will replace phones one day? Let me know your thoughts! 🚀

5 Money Hacks for Travel in 2024: Save Money Traveling the World

Ever dream of tossing a backpack over your shoulder, grabbing a one-way ticket, and traveling the world? If you’re worried about how much it costs, this article is for you. These five practical money-saving hacks are based on real experiences, showing you how to save a significant amount of money while traveling.

1. Stay in Hostels Instead of Hotels

Accommodation is often one of the most expensive aspects of travel, but it doesn’t have to be. Instead of booking pricey hotels, try hostels. Not only do hostels save you money, but they also provide a unique opportunity to meet new people, especially if you’re traveling solo.

  • Cost: Hostel stays typically range from $20 to $40 per night, making it a highly affordable option.
  • Perks: Many hostels offer free breakfast, events, and the chance to book private rooms for cheaper than hotels.
  • Tip: Use apps like Hostelworld to find the best-rated and affordable hostels. Booking ahead can also help you avoid price hikes during peak seasons.

Example: A 30-day stay across multiple hostels in Europe cost just over $700—a fraction of what hotels would have charged.

2. Maximize Travel Credit Card Rewards

Travel rewards credit cards can save you hundreds on flights, accommodations, and even extra travel perks like TSA pre-check.

  • How it works: Many travel cards, such as the Chase Sapphire Preferred, offer massive sign-up bonuses. For example, after spending $3,000 in the first three months, you can earn 60,000 points—equivalent to about $600 in travel credits.
  • Strategic spending: Use your credit card to pay for major travel expenses like accommodations, flights, and train tickets. You can hit your minimum spending requirement quickly and earn free travel credits.
  • Tip: Be sure to pay off your credit card balance in full each month to avoid interest charges, which can negate the savings from your rewards.

Example: Using rewards, you could reduce your round-trip flight expenses by $400 to $500.

3. Book Flights to Cheaper Airports

Instead of flying directly to your destination, look for cheaper flights to nearby airports. Once you arrive in a nearby city, you can take a budget airline or train to your final destination.

  • Tools to use: Websites like Google Flights and Skyscanner allow you to see price maps of nearby airports, helping you find the cheapest option.
  • Tip: Be flexible with your travel dates. Avoiding high-demand travel days can significantly lower flight costs.

Example: Instead of flying directly to Dubrovnik, Croatia, consider flying to a larger airport in Italy, like Naples or Rome, and taking a cheaper flight or train into Croatia. This simple switch could save you hundreds of dollars.

4. Travel When Your Expenses Are Lowest

Timing your trip to coincide with the end of your lease, or renting out your home while you’re gone, can dramatically cut your expenses.

  • Save on rent: By planning your trip during a period when you don’t have to pay for housing back home, like the end of a lease, you can reduce your overall expenses.
  • Tip: If you own your home or are in the middle of a lease, consider renting it out on Airbnb or subletting to cover the costs of your mortgage or rent while you travel.

Example: By traveling for a month at the end of a lease, you could save $500 or more on rent.

5. Spend More Time in Less Expensive Destinations

One of the best ways to save money is to allocate more time in affordable destinations and less time in expensive ones.

  • Balance your trip: For example, Eastern European countries like Hungary are generally cheaper than Western European countries like Austria. By spending more days in Hungary and fewer in Austria, you can enjoy both destinations without overspending.
  • Tip: Research accommodation and food costs in different locations before planning how long to stay in each place.

Example: Staying five days in Budapest, Hungary, costs about the same as two days in Vienna, Austria. By spending more time in the less expensive city, you maximize your travel experience without draining your budget.


By applying these hacks, you can save a significant amount on your next trip and make traveling the world a reality. Whether it’s strategically booking cheaper flights or leveraging travel credit card rewards, a little planning can go a long way in cutting costs. Happy travels!

5 Packing Hacks for Airports You’re Missing Out On

If you’ve ever found yourself at the airport frustrated by luggage fees or overwhelmed by the amount of stuff you’re trying to fit into one personal item, this article is for you! With a few clever packing hacks, you can bring more onto the plane without having to pay for an extra checked bag. After traveling for 30 days with just one backpack, I’ve learned some tricks that will help you make the most out of your packing space, while keeping your budget intact.

1. The Shopping Bag Hack

This one’s a game changer! Most airlines allow you to bring one personal item, usually a backpack that must fit under the seat in front of you. However, there’s a clever way to sneak an extra item onto the plane: bring a shopping bag. Here’s how it works: airports are filled with stores where passengers buy clothes, electronics, and other items, and they often walk out carrying those items in shopping bags. Airlines generally don’t charge for those bags because they assume you bought them at the airport.

The hack? You don’t have to buy anything. Just carry your own shopping bag filled with stuff when you arrive at the airport. Security won’t question it, and neither will the flight attendants. You’ll essentially get a second personal item without paying for it. The only catch is that the bag shouldn’t be overly huge—something they’d assume you grabbed in the terminal.

2. Roll Your Clothes and Use Small Compartments

You’ve probably heard the advice to roll your clothes instead of folding them. It helps save space by making your clothes more compact. But here’s the next level trick: don’t just roll them—place them in the smallest compartments of your bag. For example, roll socks and underwear and tuck them into the side pockets of your backpack, leaving the main compartment free for bulkier items like shoes or electronics.

Rolling also helps prevent wrinkles, so you’ll arrive at your destination with clothes that look fresh and ready to wear. It’s all about maximizing the nooks and crannies of your bag.

3. Stuff Your Neck Pillow

Neck pillows are great for staying comfortable on flights, but did you know you can turn them into extra storage space? Many neck pillows have zippers. You can remove the cushion inside, roll up some clothes, and pack them inside the pillow. You won’t lose any comfort for your neck, but you’ll gain extra room for a few more shirts or pairs of socks.

Plus, since neck pillows are considered personal comfort items, no one’s going to stop you from bringing it on board. It’s the perfect little extra storage trick!

4. Wear and Tie Your Bulky Items

One of the easiest ways to save space in your luggage is to wear your bulkiest items to the airport. Jackets, hoodies, or even an extra pair of shoes—wear them, tie them around your waist, or strap them onto your backpack. This saves room in your bag and ensures you have more space for the smaller things.

For instance, you can tie a hoodie onto the top handle of your backpack, or even loop a pair of shoes through the straps. It might look a little funny, but it’s effective, and you won’t have to leave anything behind.

5. Board Late, Store Your Bag Overhead

If your personal item ends up being too big to fit under the seat in front of you, don’t panic! Here’s what you can do: board the plane last. Airlines are usually in a rush to take off once the last group boards, and they don’t want to waste time rearranging bags. By boarding late, you can simply place your oversized bag in the overhead compartment, where there’s usually extra space because people in your group aren’t allowed carry-ons.

It’s important to note that aisle seats often have smaller under-seat space due to bars or dividers, so boarding last also gives you the opportunity to find out if there’s room. If not, you’ll be able to store your bag above without any hassle.


With these five airport packing hacks, you’ll never have to worry about cramming everything into one tiny personal item again. Whether it’s sneaking an extra shopping bag, rolling your clothes smartly, or using your neck pillow for storage, these tricks can help you pack more efficiently and avoid unnecessary fees. Happy travels!

MacBook M1 Pro 14 Inch vs 16 Inch: Which is Best for You in 2024?

Are you stuck trying to decide between the MacBook M1 Pro 14-inch and the 16-inch models? I know the struggle — it took me weeks to figure it out when I was in the same boat. But I’ve tested both models, and by the end of this article, you’ll have a much clearer idea of which one suits your needs. Let’s dive into three reasons why you might want the 14-inch model, and three reasons why the 16-inch might be a better fit. Hopefully, this will be the last article you need to read before making your choice!

Why the 14-inch MacBook Pro M1 Might Be Best for You

1. Portability is Key
The 14-inch MacBook weighs 3.5 lbs, while the 16-inch comes in at 4.7 lbs. That 1.2 lbs difference may not seem like much at first, but if you’re carrying it around all day, you’ll notice it, especially when traveling. Whether you’re hiking, commuting, or just running around the city, every pound counts. The 14-inch is also about two inches shorter vertically, making it a better fit in smaller bags, leaving room for other travel essentials.

2. You Don’t Need the Extra Screen Space
Ask yourself this: Do you really need a bigger screen? If you don’t work with apps that demand tons of screen real estate — like video editing software with multiple windows and settings — the 14-inch may be more than enough. If you’re just browsing the web, writing, or even recording music, you likely won’t benefit from the extra two inches the 16-inch offers. Trust your intuition — if a bigger screen has never made a huge difference in your workflow, the 14-inch should do just fine.

3. Budget-Friendly Option
This might be the deciding factor for many people. A refurbished 14-inch MacBook can be found for around $1,000. I managed to grab mine for about $950, which is a fantastic deal for such a powerful machine. The 16-inch model, however, usually runs around $1,200 refurbished. That $200 difference can go a long way, especially if you’re looking to buy extra accessories like a USB-C hub, a nice case, or a keyboard cover. If staying within a budget is a priority, the 14-inch is a great option.

Why the 16-inch MacBook Pro M1 Might Be Best for You

1. You Need (and Love) a Bigger Screen
If you value working on a larger display, or if it’s non-negotiable for your workflow, the 16-inch model is likely the way to go. This is especially true for video editors or creatives who need to see tiny details and enjoy having a large playback screen. The 16-inch’s larger screen can save you time and effort by allowing you to see more of your project at once, and it can make you more efficient in the long run.

2. You Require More Power
Do you need powerhouse features like faster rendering, better speakers, or more RAM? The 16-inch excels in this department, making it ideal for professionals who work with large video files, complex coding projects, or even machine learning. You also get superior speakers, especially when it comes to bass, which can make a noticeable difference when you’re listening to music or editing sound. For those doing heavy-duty tasks, the extra processing power will make your workflow smoother and faster.

3. Future-Proofing is Important to You
Spending an extra $200 for all these features might seem like a lot, but think of it as an investment. The extra power and screen real estate will mean you’re less likely to feel the need to upgrade in a year or two. That could save you hundreds, if not thousands, of dollars over time. Plus, the 16-inch offers a larger trackpad, better cooling, and it runs quieter during long sessions, all of which enhance the user experience.

Final Thoughts: How to Decide

If portability and budget are your primary concerns, the 14-inch is a great choice. It’s still a powerful machine, and unless you absolutely need the larger screen and added power, you likely won’t feel like you’re missing out. On the other hand, if you prefer a larger screen for tasks like video editing or need the extra performance for intensive work, the 16-inch is worth the extra money.

Not sure which to pick? One option is to test both models yourself. Purchase one, try it for a few weeks, and if you feel like you’re missing out on features, return it for the other model. Both versions come with a 30-day hassle-free return policy, so there’s no risk in giving it a shot!

If you’re ready to buy, I’ve included links to the exact versions I purchased below. Full disclosure: these are affiliate links, meaning I earn a small commission if you decide to make a purchase through them, at no extra cost to you.

I hope this article made your decision easier, and you’re one step closer to picking the right MacBook for your needs!

Is the MacBook M1 Pro 16 Inch the Best Travel Laptop for 2024?

Traveling is becoming more popular than ever, and many people are working remotely, whether they’re in Thailand, Europe, or simply another state. If you’re like me and need a laptop that can handle heavy workloads like video editing while on the go, the MacBook M1 Pro 16-Inch might be the perfect option. After backpacking through Europe for 30 days with this laptop, I’ve tested it in all sorts of environments — from tight plane seats to cramped trains. So, is the 16-inch MacBook M1 Pro the best travel laptop for 2024? Let’s dive in.

Portability: Is 16 Inches Too Big?

When you think of a travel laptop, you probably want something portable — perhaps a 14-inch or even a MacBook Air comes to mind. But here’s the deal: I was traveling to edit videos every single day, sometimes for hours. With that workload, I needed the extra power of the 16-inch model, and it didn’t disappoint. Surprisingly, the size wasn’t an issue. I expected the 16-inch to be bulky, but it’s actually only slightly larger than the 15-inch MacBook Pro I was used to.

Despite the larger screen, it fit easily in my backpack and was portable enough to use in tight spaces. Whether I was on a train, in bed at a hostel, or even in a coach seat on a plane, I had no problem using it comfortably. The bigger screen was a game-changer for video editing, giving me the real estate I needed to be productive.

Power and Performance on the Go

The 16-inch MacBook M1 Pro is an absolute beast when it comes to performance. For someone who’s editing videos while traveling, this is a huge advantage. The built-in SD card slot made it easy to transfer footage, and the USB-C ports helped me quickly transfer audio from my DJI mic setup. The whole editing experience was smooth and seamless, and the laptop never once struggled to keep up.

Even more impressive were the speakers. For a travel laptop, you usually don’t expect great sound, but the MacBook’s speakers blew me away. It felt like I was watching a movie with a high-quality sound system — not something you’d normally experience on a laptop, especially when traveling.

Does It Attract Too Much Attention?

One concern I had before traveling with this laptop was safety. The MacBook Pro is an expensive piece of tech, and I didn’t want to become a target for theft while exploring unfamiliar places. My solution was simple but effective: I used a wood-themed case that covered the Apple logo. With the case on, the laptop looked like any other device, and I felt much more comfortable carrying it around.

If you’re worried about safety while traveling, I highly recommend getting a case that conceals the laptop’s high-end appearance. It’s a small step that makes a big difference in how secure you feel carrying such a pricey item.

Does the Weight Matter?

Let’s talk about weight. At 4.7 pounds, the 16-inch MacBook M1 Pro is heavier than some alternatives like the MacBook Air. But here’s the thing: I used it every single day, so the weight was never an issue. In fact, the weight was worth it because of how much I used the laptop for work. I carried lighter items on my trip that I barely used, and those were the things I regretted packing — not the MacBook.

Whether I was hiking or walking through city streets, I never once thought the MacBook was too heavy. It’s all about how much you’re going to use it, and for me, it was more than worth the extra weight for the power and screen size.

Is There a Better Option?

Could another laptop have been a better choice? Maybe a smaller model or a newer MacBook M3? For the type of work I was doing — video editing with a need for performance and screen real estate — the answer is no. The 16-inch MacBook M1 Pro was perfect. The larger screen, powerful performance, incredible speakers, and solid build quality made it the ideal travel companion. For only a couple hundred dollars more than the 14-inch model, the 16-inch version provided more than twice the value for me.

Conclusion: The Best Travel Laptop for 2024?

For anyone who needs a laptop capable of handling demanding tasks like video editing while traveling, the MacBook M1 Pro 16-Inch is, without a doubt, the best option. The size, weight, and power make it perfect for creative professionals on the go, and I’d choose it over any smaller or less powerful laptop every time.

If you’re interested in checking out the MacBook M1 Pro 16-Inch, here’s the link to the version I use. If you prefer a different color, you might also want to look at the Space Gray version, which may even be cheaper depending on demand.

Note: The links provided are affiliate links, meaning I may earn a commission if you purchase through them, at no additional cost to you. Thank you for your support!

Happy travels!